When emergencies unfold, every second matters — especially for families with children who rely on mobility aids or medical equipment. Evacuating safely takes more than speed. It takes strategy, support, and the right preparation.
👉 Looking for the full guide to disaster planning for families with special needs? Start here.
Why Evacuation Planning Matters More for Medically Complex Families
For many, evacuation is simply a matter of “grab and go.” But if your child uses a wheelchair, feeding tube, ventilator, or any other assistive device, you already know — nothing is ever that simple.
Even small delays in power or access can lead to big consequences. That’s why preparing early and intentionally is one of the most loving, life-sustaining actions you can take.

Step-by-Step: Creating an Evacuation Plan That Works for Your Family
1. Register with Local Emergency Services
Some counties offer Functional and Access Needs Registries — programs that allow families to voluntarily share their medical or mobility-related needs with emergency responders ahead of time.
Do this now, not later.
What to ask:
- Is there a registry or database for households with special medical needs?
- Are shelters in your area equipped with generators and accessible spaces?
- Will transportation be available during evacuations — and can it accommodate wheelchairs or medical equipment?

2. Map Out Your Evacuation Routes
Not all exits, roads, or shelter sites are created equal. Consider:
- Stairs vs. ramps — Is your home truly accessible in an emergency?
- Backup exits — What if your primary route is blocked?
- Transportation — Do you have a vehicle that fits your child, medical gear, and family?
- Alternative locations — Hospitals, friends’ homes, or disability-friendly shelters
💡 Tip: Call ahead and ask your local emergency shelters about medical equipment accommodations and accessible facilities.
3. Pack an Evacuation-Friendly Medical Kit
Your child’s medical equipment may be essential to their health, but it isn’t always easy to transport — especially in a hurry. That’s why it’s important to create a compact, evacuation-friendly version of your child’s medical kit that you can grab quickly if you need to leave home. This kit should include copies of prescriptions and a medical summary outlining diagnoses, allergies, and provider contacts. Pack portable chargers or backup batteries for any power-dependent devices, as well as extra feeding supplies like tubing, formula, and syringes. If your child uses oxygen tanks, suction units, or other critical equipment, include lightweight versions if possible. Don’t forget hygiene essentials and clear identification tags for both your child and their gear. Lastly, include a simple, printed list of care instructions for anyone unfamiliar with your child’s routine — this can be a lifesaver if responders or backup caregivers need to step in during an emergency.
4. Plan for Power Outages
If your child relies on powered medical devices, power loss can be critical. Consider:
- Backup batteries (stored and rotated regularly)
- Manual alternatives, if safe and possible
- Portable power stations or generators
- Notifying your utility company in advance — some offer priority service or medical baseline programs for outages
5. Practice, Practice, Practice

Creating a plan is a powerful first step — but practicing it is what truly builds confidence and calm. Emergencies are stressful by nature, and the more familiar the steps feel, the more likely your child (and your whole family) will be able to act quickly and safely when it matters most. Aim to run through your full evacuation plan at least twice a year, and more often if your child thrives on repetition or routine. Practice loading and securing any mobility equipment so it becomes second nature. Run timed drills from different rooms or levels of your home to see how long it takes to exit safely. If you plan to use a specific vehicle or alternate transportation method, make sure your child has experienced it ahead of time — especially if it involves public transit, accessible vans, or emergency ride services. Practicing in calm moments turns emergency response into muscle memory, and that kind of preparation can make all the difference when emotions are high.
Keep Your Plan Written and Accessible
In a high-stress situation, even the best plans can be hard to remember — that’s why it’s so important to keep your emergency plan written down and easy to access. Store it in a waterproof folder in your go-bag, post a copy in your home, and share it with your trusted caregivers or emergency contacts. Your written plan should include evacuation routes and backup locations, a list of any essential medical equipment your child relies on, and up-to-date contact information for doctors, specialists, and local emergency services. Be sure to include specific notes about your child’s needs during transport or sheltering — such as sensory accommodations, dietary requirements, or power-dependent devices — and detailed instructions for caregivers who may not be familiar with your child’s routine. Having this information documented and available gives you peace of mind, and ensures that others can step in and provide safe, consistent care when it’s needed most.
👉 Want tools to help you get started? Download our Special Needs Disaster Preparedness Guide
You Can Help a Family Evacuate Safely — or Be the Help They Need
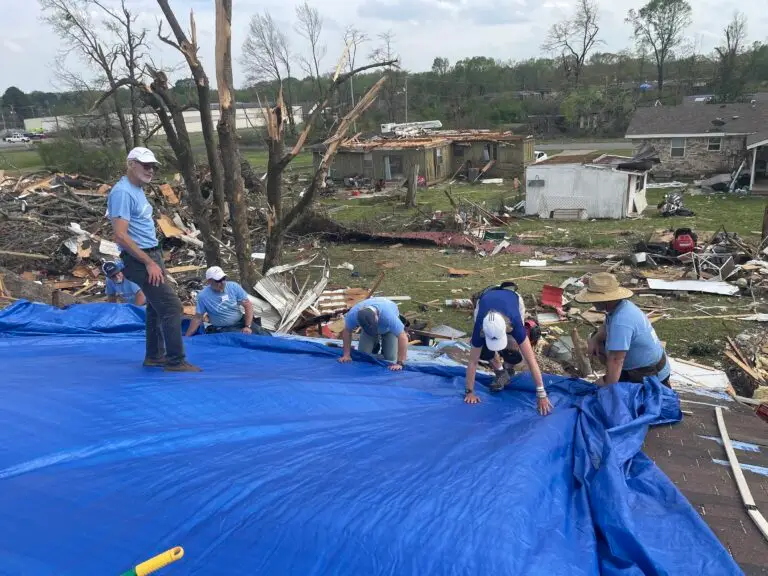
At Hope Force International, we don’t wait for disaster to hit. We train, equip, and show up for families when it counts — and that includes those with complex medical needs.
Become a Hope Force Reservist
Get trained to be ready. Join a movement of volunteers who step in when hope is needed most. Learn more.
Support the Mission
Your donation equips us to reach medically vulnerable families — with supplies, shelter, and support in their most vulnerable moments. Give now.